











Pumpkin Carving Ideas 2026: Beginner Patterns, No-Carve Designs & Porch Displays


Pumpkin Carving Ideas 2026: Beginner Patterns, No-Carve Designs & Porch Displays
If your pumpkin carving history is one triangle-eyed face and a lot of sawing, this is your year to level up — gently. These easy pumpkin carving ideas for beginners are built as a ladder: the first designs need nothing but straight cuts and confidence, the later ones add curves and etching, and every pattern here is an original you can sketch freehand — no downloads, no character stencils, no copyright traps. There are also no-carve and painted designs for kids and for anyone who would rather not wield a saw. And because Halloween 2026 falls on Saturday, October 31, carving this week is not last-minute panic — it is exactly right: a carved pumpkin stays fresh for only a few days, so one carved on Thursday or Friday is at its glowing best on the big night.
Picking & Prepping the Pumpkin
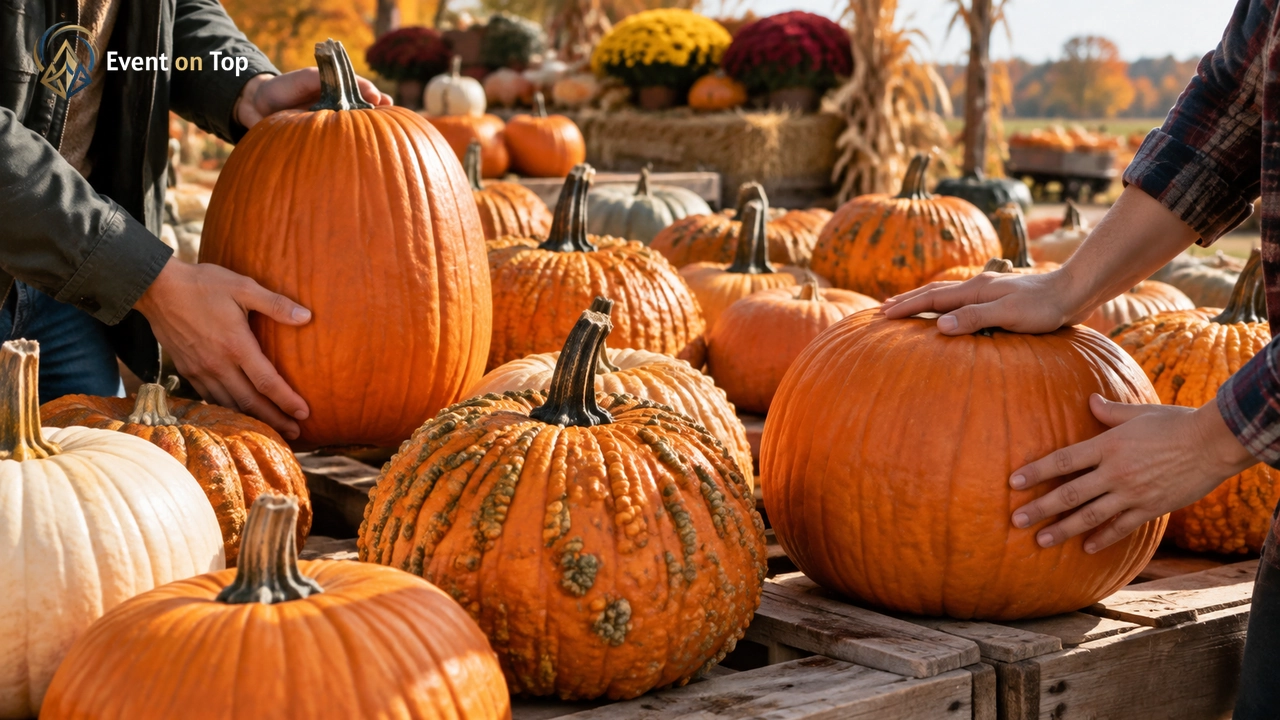
Great carvings start at the pumpkin patch, not at the kitchen table. Still need yours? A patch trip doubles as one of the best family days out of the season — our Family Halloween Events 2026 guide rounds up the best pumpkin patches and corn mazes. Wherever you buy, choose like a carver:
- Firm all over, no soft spots. Press the skin with a thumb; any give means decay has started, and soft spots are where mold moves in first.
- A sturdy, greenish stem. Extension services advise choosing a pumpkin with a green stem still attached — a dry, shriveled or missing stem signals an older pumpkin with less life in it. And never carry it by the stem; a snapped stem opens a wound for bacteria.
- A flat-ish face. The side carrying your design should be smooth and relatively flat — deep ribs fight your saw and distort faces. Save the lumpy side for the back.
- Size for the design. A medium pumpkin (around 8–12 inches across) is the sweet spot for beginners: thick enough walls to hold detail, small enough to scoop without a workout.
- Thick walls, hollow sound. Knock on it — a ripe carving pumpkin sounds slightly hollow, and the wall should feel substantial, not paper-thin.
Prep is half the craft. Wash the outside to remove field dirt, and dry it well — designs drawn on a wet pumpkin smear, and tape will not stick. Then make the opening cut where carvers increasingly prefer it: in the bottom (or the back), not the top. NC State extension guidance recommends exactly this: the crown and stem stay intact so the pumpkin holds its shape, and at lighting time you simply set the pumpkin down over its light. Scoop out every seed and string, then scrape the design wall to about an inch thick where you will carve, so light glows through evenly and the saw works less. Dry the inside with a paper towel; a drier interior molds more slowly. Set the seeds aside in a bowl (there is a plan for them in the FAQs).

Beginner Carving: 8 Designs by Difficulty
Work down the ladder as far as your ambition goes. Every design is an original from this guide — sketch it freehand with a washable marker, or use the stencil section below to transfer it neatly. One technique applies to all of them: cut the smallest details first, saw gently back and forth and let the teeth do the work, and push cut pieces out from inside rather than pulling them.
Level 1 — straight cuts and zero stress
1. The Classic Grin. Two triangle eyes, an upside-down triangle nose, and one wide crescent mouth with a single square tooth left standing. It is the design everyone pictures, it takes about fifteen minutes, and it reads as pure Halloween from the street.
2. Polka-Dot Glow. No face at all: an adult drills (or twists an apple corer through) a scatter of different-sized holes across the front, and the pumpkin becomes a lantern of dotted light. It is the fastest design here, the most forgiving of wobbly hands, and stunning in a group of three.
Level 2 — gentle curves
3. Cat Face. Two pointed-ear triangles at the top edge, slanted oval eyes, a small triangle nose, and three short slits per cheek for whiskers. Work the ears into the pumpkin’s top rim rather than cutting them separately, and the face reads instantly, especially backlit.
4. Crescent Moon & Stars. One big crescent moon — draw two overlapping circles and cut the moon shape between them — surrounded by four- and five-pointed stars. Stars are just straight short cuts meeting at points, so this looks far more skilled than it is.
Level 3 — more cuts, more patience
5. Owl Eyes. Two large circles (trace a jar lid, then a smaller cup), with a smaller uncut circle left at the center of each as the pupil, a small diamond beak between them, and two shallow brow arcs above. The layered circles glow at different brightnesses because the pupil wall stays thicker — an accident of physics that looks like pure skill.
6. Haunted House. All straight lines, just more of them: a tall rectangle body, triangle roof, one door, three square windows, and a small circle moon beside the roofline. Cut windows first, door second, outline last, so the structure stays strong while you work. A crooked line does not ruin this design — it makes the house look haunted, which is the point.
Level 4 — surface carving (no cut-throughs)
7. Etched Spiderweb. Instead of cutting through the wall, shave away only the skin with a linoleum cutter: radiating lines from one top corner, joined by sagging arcs. Because the flesh stays intact, etched designs dry out far more slowly than cut ones, and at night the web glows as a soft silhouette rather than a bright opening.
8. Peek-a-Boo Ghost. A rounded ghost outline — dome top, wavy bottom — cut through the wall, with two small oval eyes cut inside the outline’s upper half. The trick is contrast: the ghost shape glows bright while the face stays cheeky and simple.
Free Original Stencils (How to Transfer & Carve)
The eight designs above are the stencils — drawn for this article, free to copy, and built from shapes anyone can sketch. If freehand drawing on a curved, ribbed surface sounds optimistic, transfer the design first with one of these three methods:
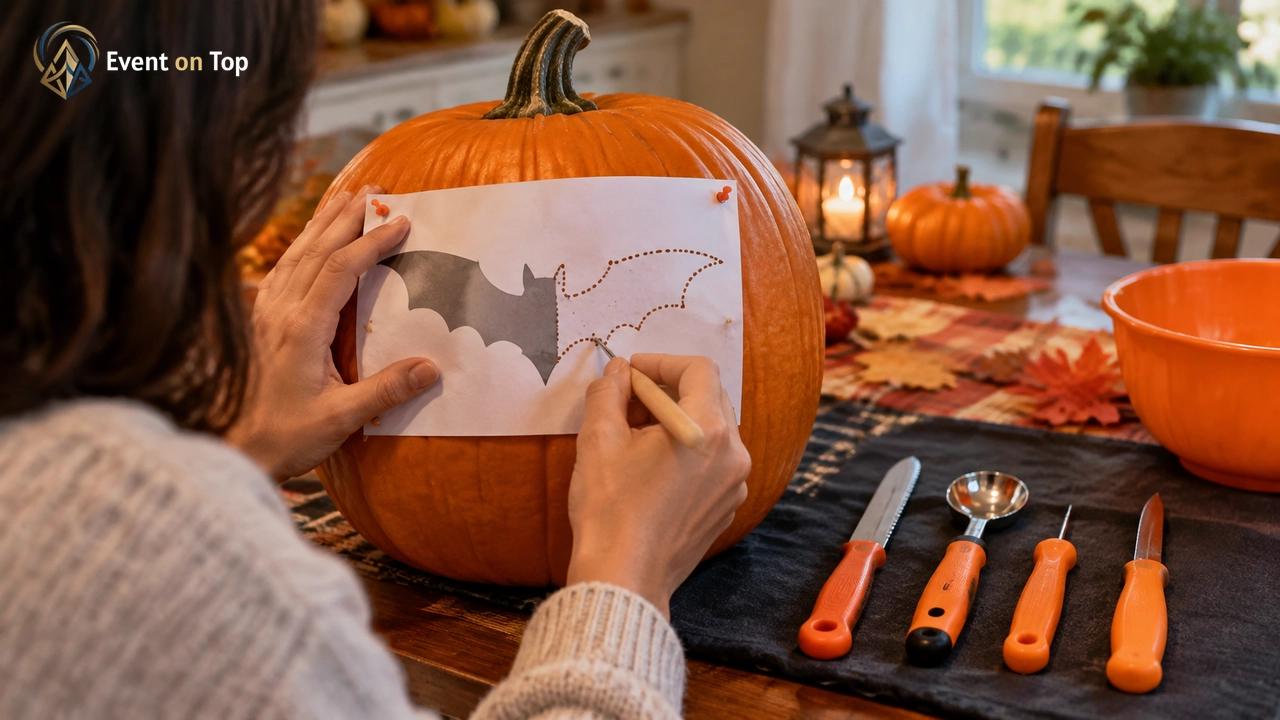
- Pin-prick (pounce) method. Sketch the design on paper, tape the paper firmly to the pumpkin’s face, and poke along every line with a pin tool or thumbtack, spacing the holes closely. Remove the paper and dust the dotted outline with a pinch of flour or chalk so the pattern shows up clearly. This is the oldest stencil technique in carving and still the most reliable.
- Transfer paper. Slip dressmaker’s transfer (carbon) paper between your sketch and the pumpkin, tape both down, and trace over the lines firmly with a pencil. The outline appears on the skin ready to cut.
- Direct marker sketch. Draw straight onto the pumpkin with a washable marker or dry-erase pen — mistakes wipe off with a damp cloth, which makes this the best method for kids designing their own faces. Draw, step back, adjust, then carve.
Whichever you choose, follow the carver’s order of work: smallest and innermost details first, outlines last, because a pumpkin gets structurally weaker with every cut. Keep cuts slightly inside your drawn line — you can always widen a cut, but you cannot put pumpkin back. And stop every few cuts to push waste pieces out from inside — a clear workspace makes the rest easier to judge.
No-Carve Decorating: Paint, Push-Ins & Wrap Ideas
No-carve pumpkins are not the consolation prize — they are the designs that can be finished a week early and still look perfect on October 31, because the skin is never broken. Mix a few in with your carved ones and your display starts earlier and lasts longer.
- Push-in kits and pegs. Decorating kits with plastic eyes, ears, fangs and hats simply push into the flesh — no glue, no mess, reusable next year, and safe for kids to do themselves. Wooden golf tees and thumbtack “studs” (an adult’s job, that one) make hedgehog and starburst effects.
- Decoupage. Tear patterned paper napkins or tissue into pieces, brush them onto the pumpkin with white craft glue thinned with a little water, and smooth as you go. A single printed layer turns translucent and looks hand-painted; a final glue coat seals it. Botanical prints and vintage-style Halloween illustrations work beautifully.
- The cheesecloth mummy. Wrap the pumpkin loosely in strips of cheesecloth or gauze bandage, tucking the ends underneath, then glue on two large googly eyes peeking from the folds. Ten minutes, no artistic skill required, and hugely effective on a doorstep at dusk.
- Lace and ribbon wraps. A length of black lace fabric or a stocking stretched over a white or pale pumpkin gives an elegant gothic pattern with zero drawing. Ribbons worked in vertical stripes down the ribs, meeting under a bow at the stem, read as instant “gift-wrapped” chic.
- Stickers and washi tape. Foam stickers for kids, metallic washi-tape stripes, dots and zigzags for everyone else. Tape peels off cleanly, so this is the one technique you can redo all afternoon.
Painted Pumpkins Kids Can Do
Painting is where children stop being assistants and become the artists. Because the pumpkin is never cut, painted pumpkins can be made days ahead, redone when inspiration strikes, and handled safely by every age. Three rules keep it fun rather than chaotic: paint only on a clean, dry pumpkin (paint slides off a damp one); use washable tempera for under-6s and acrylic or paint pens for older kids — acrylic is permanent on clothes, so old shirts are the uniform; and let a base coat dry fully before details, or the colors turn to mud.
Designs children genuinely succeed at: a white handprint turned into a ghost (print, let dry, add two dot eyes and an O mouth); sponge-stamped bats and stars in black over an orange or purple base; a rainbow pumpkin painted in arcs around the ribs; splatter pumpkins in glow-in-the-dark paint, flicked from a brush at outdoor distance; and candy-corn painting, in white, orange and yellow bands. For faces without fear, paint pens beat brushes — they draw like markers, so a child who can write their name can draw a grin.

Porch Display: Grouping, Lighting & Making Them Last
A single jack-o’-lantern is a decoration; a grouped display is a destination. The formula professionals use — and the one behind the 7,000-pumpkin spectacle of the Great Jack O’Lantern Blaze, covered in our Best Halloween Events in the USA 2026 guide — is simpler than it looks: group in odd numbers (three or five read better than two or four), vary the heights with steps, crates, hay bales or an upturned bucket, and mix the finishes — carved pumpkins for glow, painted and whole pumpkins for color in daylight. Put the most detailed carving at eye level; let simple bright faces work the curb. Building the full porch scene for guests? Our Halloween Party Ideas 2026 guide has the decor bank to match.
For lighting, battery LED tea lights and puck lights win on every count: brighter than a candle, unfazed by wind, safe around costumes and dry leaves, and — because a real candle’s heat literally cooks the pumpkin from inside, as NC State Extension notes — kinder to the carving itself. A string of warm fairy lights woven between pumpkins finishes the scene.
The final-week timeline (so everything peaks on Saturday, October 31):
| When | The job |
|---|---|
| The weekend before (Oct 24–25) | Buy pumpkins; make all painted and no-carve designs |
| Wed–Thu (Oct 28–29) | Carve detailed designs (Levels 3–4); etched designs can go a day earlier |
| Fri (Oct 30) | Carve the simple faces (Levels 1–2); roast the seeds from every session |
| Sat (Oct 31), morning | Set out the display, load the LED lights |
| Sat (Oct 31), dusk | Lights on — peak pumpkin |
Making carved pumpkins last to the night is a short, proven routine, drawn from university extension guidance. Scoop thoroughly and dry the inside (leftover pulp molds first). Then disinfect: soak or spray with a 10 percent bleach solution — 9 parts water to 1 part bleach — or, if the pumpkin will be composted or left where wildlife can reach it, use the gentler vinegar soak instead, 1 part vinegar to 10 parts water for 20–30 minutes (NC State’s recommendation; never mix bleach and vinegar, and let an adult handle either solution with gloves on). Rub petroleum jelly on the cut edges to lock in moisture — Utah State Extension backs this — but only if you are lighting with LEDs, because petroleum jelly is flammable near a real flame. Finally, keep pumpkins cool and shaded — extension services suggest roughly 50–60°F — bringing prized carvings into a cool garage or fridge overnight.

Pumpkin Safety
Pumpkin decorating is one of the safest crafts of the season — as long as the jobs are split by age and the sharp work stays with adults.
Knives and tools. Adults do all the cutting, always. A purpose-made carving kit’s serrated saw is the right tool: it is designed to bite into pumpkin flesh without the force a kitchen knife needs, and kitchen knives are the ones that stick, slip and cause the classic Halloween hand injury. Work on a flat, stable surface, keep hands and tools dry, cut away from your body, and slow down — saws reward patience, not pressure. Power drills (polka dots) and linoleum cutters (etching) are adult tools too, and get put down between cuts.
Kids’ jobs vs. adults’ jobs. Children can do almost everything except the cutting: choosing and drawing the design, taping on the stencil, scooping seeds and strings (spoons and bare hands both welcome — it is gloriously gross), pushing in decorations, painting, and placing the LED light inside the finished pumpkin. That division keeps every child busy and every blade accounted for.
Candles vs. LEDs. If you light with a real candle, use a short votive in a glass holder, set it on a non-flammable surface away from curtains, costumes and dried leaves, poke a few small vent holes in the pumpkin’s top to release heat (NC State’s tip), and never leave it burning unattended or overnight. Our honest recommendation is the LED: no flame near petroleum-jelly-sealed edges, no heat cooking the flesh, no relighting in the rain — still glowing when the last trick-or-treaters pass.
Frequently Asked Questions
When should I carve so it lasts until Halloween?
Carve as late as you comfortably can. A carved pumpkin typically looks its best for only about 3–5 days before the cut edges soften and mold appears, so for a Saturday, October 31 peak, carve detailed designs Thursday or Friday and simple faces Friday or Saturday morning. Etched and no-carve pumpkins keep far longer — make those the weekend before. Warm climates shorten the window; cool ones stretch it.
How do I make a carved pumpkin last longer?
The short version of the Porch Display routine: scoop and dry the interior, disinfect with a 10 percent bleach solution (or a 1-to-10 vinegar soak if wildlife or compost will reach it), seal the cut edges with petroleum jelly if you’re using LEDs, and keep the pumpkin cool and shaded — around 50–60°F, in a garage or fridge overnight. A daily mist of the same solution helps. Nothing makes a carved pumpkin immortal, but together these steps buy the extra days to Halloween.
What can kids safely do?
Everything except wield the blade. Kids can pick the design, draw or trace it, scoop out seeds and strings, push in decorations, paint, decoupage, wrap the mummy pumpkin, and switch on the LED light at showtime. Adults handle saws, knives, drills and etching cutters — plus any bleach or vinegar solutions, with gloves.
LED or real candle?
LED, for almost everyone: brighter, windproof, safe around costumes and dry decorations, free of the candle heat that speeds up rot, and the only option compatible with petroleum-jelly-sealed edges. If you love real candlelight: a votive in a glass holder, vent holes in the top, keep it attended, and blow it out before bed.
What do I do with the seeds?
Roast them — don’t bin them. Rinse the seeds clean of pulp, dry thoroughly, toss with a little oil and salt, and roast at 300°F for roughly 30–45 minutes, stirring now and then, until golden and crisp (they crisp further as they cool). Go sweet with cinnamon sugar or spicy with smoked paprika and cayenne.
Light Them Up on Saturday
However far up the ladder you climb — a fifteen-minute Classic Grin or a full etched spiderweb — the secret of a great Halloween porch is timing, not talent: paint early in the week, carve late, light with LEDs, and let Saturday night do the rest. Pick one design, sketch it tonight, and by October 31 your doorstep will be the one the neighborhood photographs.

